
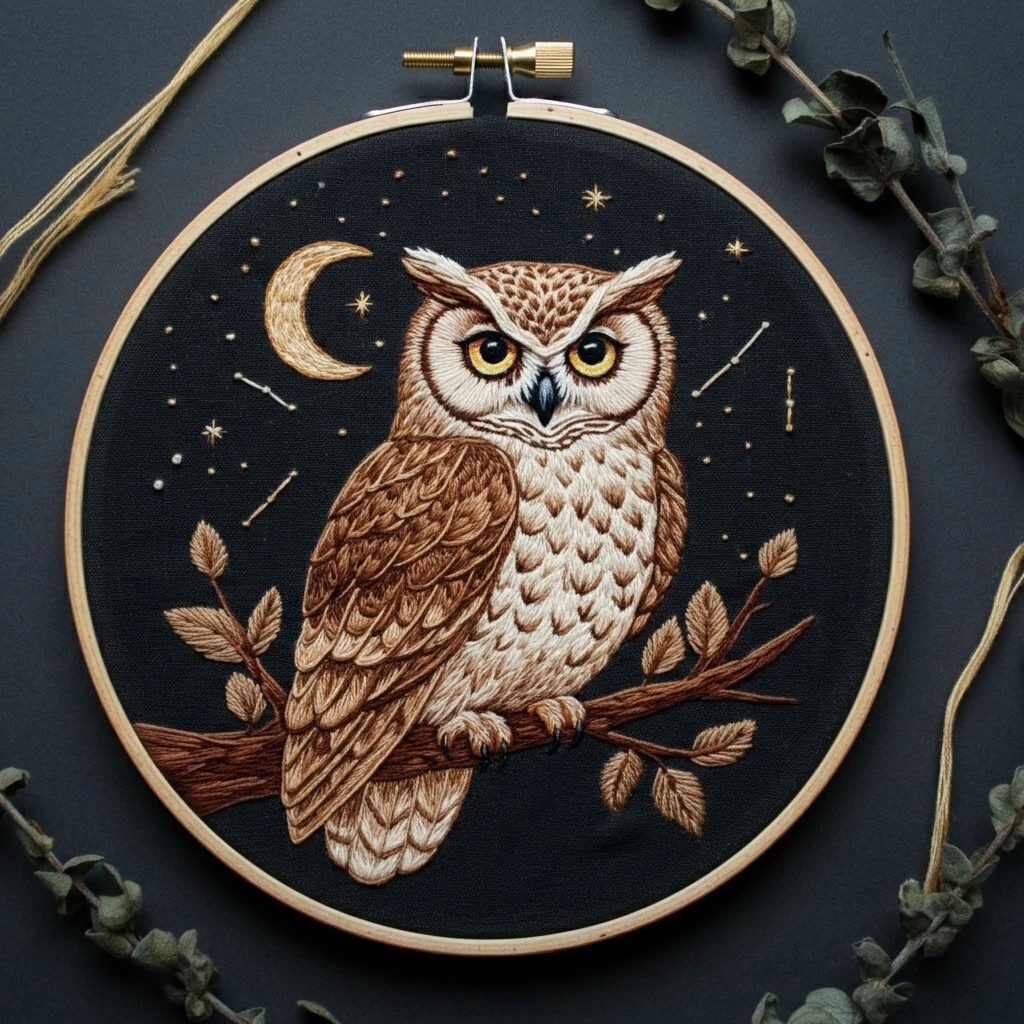
Majestic Owl And Celestial Night
A warm woodland owl stitched on deep night fabric, framed by a crescent moon, golden stars, tiny constellations, and a textured branch. The effect works best with layered browns, creamy feather highlights, antique gold accents, and crisp pale lines against a dark ground.
Recommended DMC Color Palette
Use this palette as a practical stitching map rather than a rigid rule. The owl needs the widest brown range; the celestial details should stay lighter and sparklier so they float over the dark fabric.
Pupils, deepest beak edges, tiny shadow accents, and optional outline reinforcement.
Subtle night-sky outlining on black fabric or soft shadow stitches around constellations.
Darkest wing cuts, branch undersides, ear tuft bases, and bark cracks.
Main branch, owl side shadows, outer wing contour, and warm feather depth.
Primary feather strokes, crown texture, and bark grain.
Layered feather centers, face contours, and warmer wing transitions.
Highlights on wing scallops, chest marks, toes, and leaf midribs.
Soft tan feather glow, lower belly accents, and gentle leaf fills.
Creamy face disks, pale chest fills, moon texture, and feather tips.
Bright facial highlights, eye glints, star sparkle points, and crisp feather edges.
Golden moon, starbursts, eye irises, and warm celestial dots.
Eye shadows, star centers, moon underside, and antique gold contrast.
Soft star halos, constellation dots, and gentle moon highlights.
Beak body, claw shadows, and cool depth under the eyes.
Fine constellation lines and cool highlights on beak or claws.
Muted leaf shadows, branch highlights, and quiet transition stitches.
Stitch Plan by Design Area
Thread Count & Blending Guide
Fine details
Use 1 strand for constellation lines, facial whisker-like feather marks, small star rays, and the darkest beak separation.
Main fills
Use 2 strands for most owl feathers, moon fills, leaf fishbone stitches, and branch stem stitching. This gives coverage without bulk.
Bold texture
Use 3 strands only for raised bark ridges, larger French knots, or emphasized outer contours. Too many thick stitches can blur the feather detail.
| Blend | Where to Use | Effect |
|---|---|---|
| 1 strand 433 + 1 strand 434 | Wing body and crown | Natural tawny feather variation |
| 1 strand 739 + 1 strand 3865 | Face disks and chest highlights | Soft ivory glow without stark white blocks |
| 1 strand 3821 + 1 strand 677 | Moon and large star points | Warm antique-gold shimmer |
| 1 strand 3371 + 1 strand 898 | Deep branch grooves and wing shadows | Rich shadow that still reads as brown |
| 1 strand 642 + 1 strand 436 | Leaves and muted botanical sprigs | Dusty taupe leaf color that does not fight the owl |
Outlining, Shading & Texture Suggestions
Use selective outlining
Outline the owl silhouette, eyes, beak, and branch with split stitch in DMC 3371 or 898. Avoid outlining every feather; instead, let small interior stitches create texture.
Build feathers in layers
Start with the darker underlayer, then add mid-tone strokes over it, then finish with small pale tips. This is easier to control than trying to blend every color in one pass.
Keep celestial elements airy
Stars and constellations should be stitched with small knots and single-strand lines. Leave generous negative space so the night sky stays elegant.
Shape the eyes last
Stitch the iris and pupil after the surrounding face is complete. This keeps the owl expression crisp and lets you adjust the final highlight placement.
Beginner-Friendly Practical Tips
Transfer on dark fabric
Use white transfer paper, a water-soluble white pencil, or a fine chalk pencil. Test removal on a fabric scrap before tracing the full design.
Needle choice
A size 7 or 8 embroidery needle suits two-strand work. Switch to a sharper, smaller needle for one-strand constellation lines and eye details.
Hoop tension
Dark fabric shows puckering easily. Keep the fabric drum-tight, but loosen the hoop between sessions to prevent permanent ring marks.
Thread length
Use shorter lengths, about 14–16 inches, especially with browns and metallics. Short lengths reduce fuzzing and keep feather strokes clean.
Work sequence
Stitch the branch first, then owl body, face, eyes, leaves, moon, and finally tiny stars. Saving knots and sparkle for last keeps them clean.
Check contrast often
Step back every few minutes. If a brown disappears into another brown, add a single lighter highlight or deepen the edge with 3371.
Quick Working Recipe
For a polished finish, keep the owl richly layered, the sky delicate, and the moon warm but not overpowering.
- Outline the main owl, branch, moon, and constellation placement with one-strand back stitch.
- Fill the branch with stem stitch and bark texture before stitching the owl feet over it.
- Build the body feathers with dark-to-light brown rows, following the natural curve of each wing and chest section.
- Stitch the face disks in curved short-and-long stitches, then add brow feathers and beak shadows.
- Add the golden eyes, then place the white eye glints once both pupils are even.
- Finish with moon shading, star knots, delicate constellation lines, and a final cleanup of any visible transfer marks.