
DMC palette & hand embroidery notes
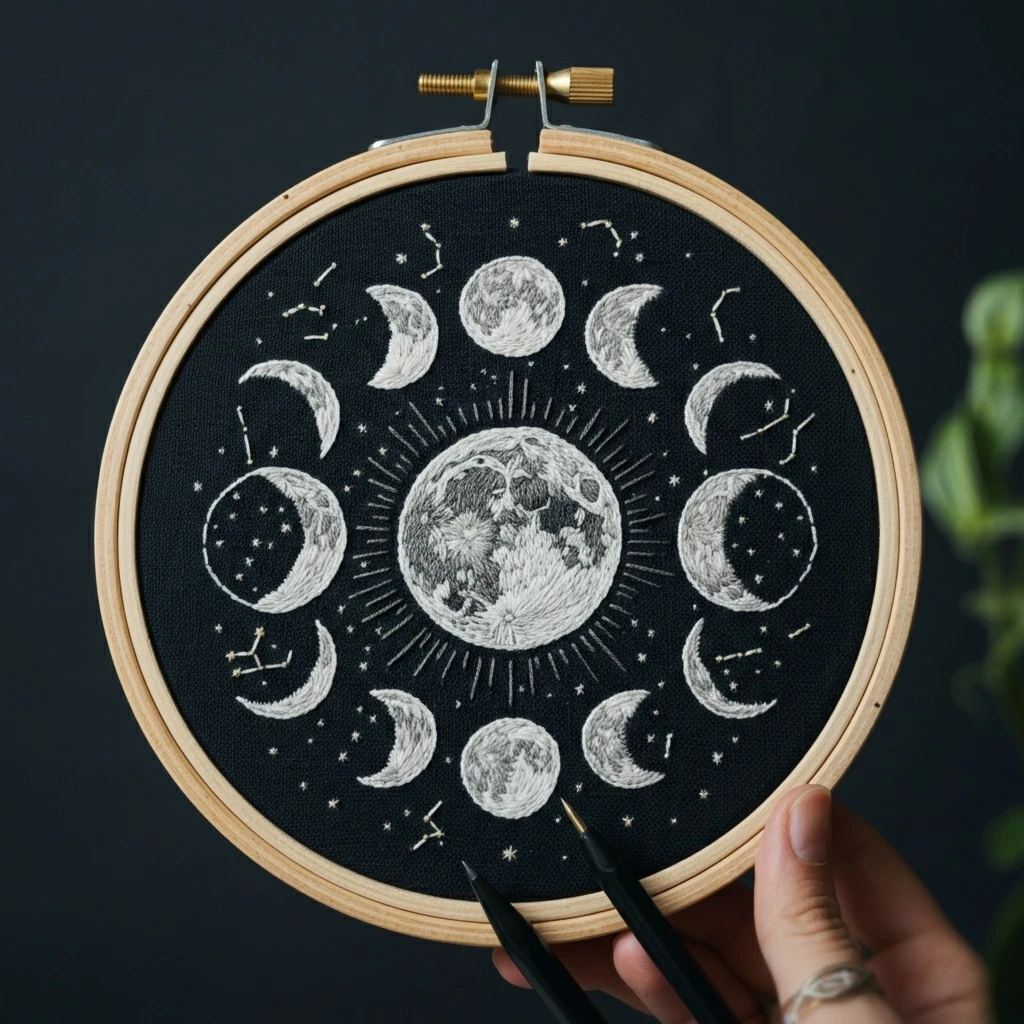
Moon Phase And Constellation
This design reads as a celestial monochrome: crisp moon phases circling a textured full moon, delicate radiating lines, tiny stars, and simple constellation marks stitched in white and soft gray on black or midnight fabric. The mood is clean, graphic, and quietly luminous, so the best palette relies on subtle value shifts rather than many colors.
Suggested DMC Color Palette
The reference image is essentially stitched in values of white, pearl gray, and pewter on very dark fabric. That means the most useful DMC choices are not bright rainbow shades, but a carefully stepped grayscale that lets craters, crescents, and constellation dots stay readable without losing the elegant monochrome look.
Stitch Map by Design Area
- Long and short stitch: Build the main full moon with 3865, 762, and 415, changing stitch direction in small curved zones so the surface feels cratered instead of flat.
- Seed stitch and tiny split stitches: Dot small crater textures with short scattered marks in 415, 318, and occasional 413.
- Soft outline: Use one strand of Blanc or 3865 in split stitch around the outer circle so the moon edge stays clean without looking cartoon-heavy.
- Radiating halo lines: Straight stitch or backstitch in 3865 works well for the sunburst-like rays around the center.
- Crescents and quarter moons: Outline first with Blanc, then fill the lit side using satin stitch or close long-and-short stitch.
- Gibbous phases: Shade the shadow side with 762 and 415 so the illuminated edge stays bright and the phase remains easy to read from a distance.
- Consistent shape order: Stitch opposite moons as pairs to keep the circle balanced and symmetrical.
- Minimal dark shading: Add 318 or 413 only near the lower or inner shadow edges; too much deep gray will overpower the delicate celestial look.
- Backstitch: Use one strand of Blanc or 3865 for slim constellation connectors.
- Node stars: Tiny French knots, colonial knots, or small straight-stitch crosses all work well for the star points.
- Spacing matters: Keep constellation lines short and lightly tensioned so they stay neat on dark woven fabric.
- Optional warm sparkle: Add one or two DMC 3822 stars if you want a subtle antique highlight without changing the overall grayscale mood.
- French knots: Use 1 strand with one wrap for tiny stars and 2 strands with two wraps for larger accent stars.
- Seed stitch: Scatter a few short seed stitches between constellation clusters to make the sky feel filled but not crowded.
- Outlining details: If any moon edge softens too much, add a final one-strand split stitch outline in Blanc.
- Texture control: Let the center moon carry the most texture; keep the outer moons cleaner and simpler for contrast.
Thread Count, Blending & Shading Guidance
| Area | Strands | Guidance |
|---|---|---|
| Moon outlines | 1 strand | One strand gives crisp edges and refined curves. Use split stitch if you want a smoother outline around circles. |
| Central moon fill | 1–2 strands | Use two strands for the broader fill areas and one strand for the final texture marks and crater details. |
| Outer moon phases | 1–2 strands | Use two strands for satin-stitch fills on larger crescents, and one strand when adding subtle shading bands in 762 or 415. |
| Constellation lines | 1 strand | Fine backstitch keeps the sky elegant. Thicker lines make the design feel heavy very quickly. |
| French knots / stars | 1 strand | Small is better here. Tiny stars sprinkled evenly will look more like a night sky than a dense field of bulky knots. |
Blending idea: pair Blanc + 3865 for soft illuminated edges, 762 + 415 for moon-body mid-tones, and 318 + 413 for selective crater depth. If you want a cooler nighttime cast, blend a few tiny 3750 stitches into the darkest gray shadows on navy fabric.
Practical Stitching Order
- Transfer the central moon, outer moon circles, and constellation placements carefully. The success of this design depends on symmetry and clean spacing.
- Work the central full moon first. This establishes your shading range and lets you decide how much texture you want before repeating it in smaller phases.
- Add the radiating halo lines around the center using one strand of 3865 or Blanc, keeping each line evenly spaced.
- Stitch the outer moon phases in opposite pairs so the circular layout stays visually balanced as you build around the hoop.
- Backstitch the constellation lines and add their node stars once the moon shapes are complete, so the linework stays crisp and sits visually on top.
- Finish with scattered French knots, extra star points, and any final outline sharpening on the moon edges.
Beginner-Friendly Practical Tips
- Dark fabric does most of the visual work in this design, so choose black, charcoal, or midnight navy linen or cotton if possible.
- Use short thread lengths—about 12 to 15 inches—because white and pale gray floss can fuzz quickly against dark fabric.
- Test your transfer method first. A pale chalk pencil, white transfer paper, or water-soluble pen is easier to cover on dark cloth than thick chalk lines.
- Keep the outer moons slightly simpler than the center. Too much crater texture in every phase can make the design look busy.
- If you are new to shading, stitch each moon from darkest area to lightest so the highlight edge stays clean and bright.
- When making French knots for stars, wrap once for tiny stars and twice for only a few larger accents. Variety looks more natural than identical dots.
- If the moon edges become uneven, a final one-strand split stitch outline will neaten the circles immediately.
- Press the finished hoop from the back over a towel so raised knots and texture stitches keep their dimension.
Extra Texture & Finishing Suggestions
- Use tiny random stitch directions inside the central moon to mimic crater patches and rock-like texture.
- Alternate satin stitch with a few seed stitches inside gibbous phases for a slightly mottled, moonlike finish.
- Try a few detached straight stitches around brighter stars to create delicate starbursts without cluttering the sky.
- Trim jump threads neatly on the back, especially between constellation dots, so the dark fabric stays smooth inside the hoop.
- If mounting in a hoop, center the design carefully so the outer moon ring has even breathing room all around.
- For a slightly more decorative finish, lace the back neatly and cover it with felt to protect the reverse side.