
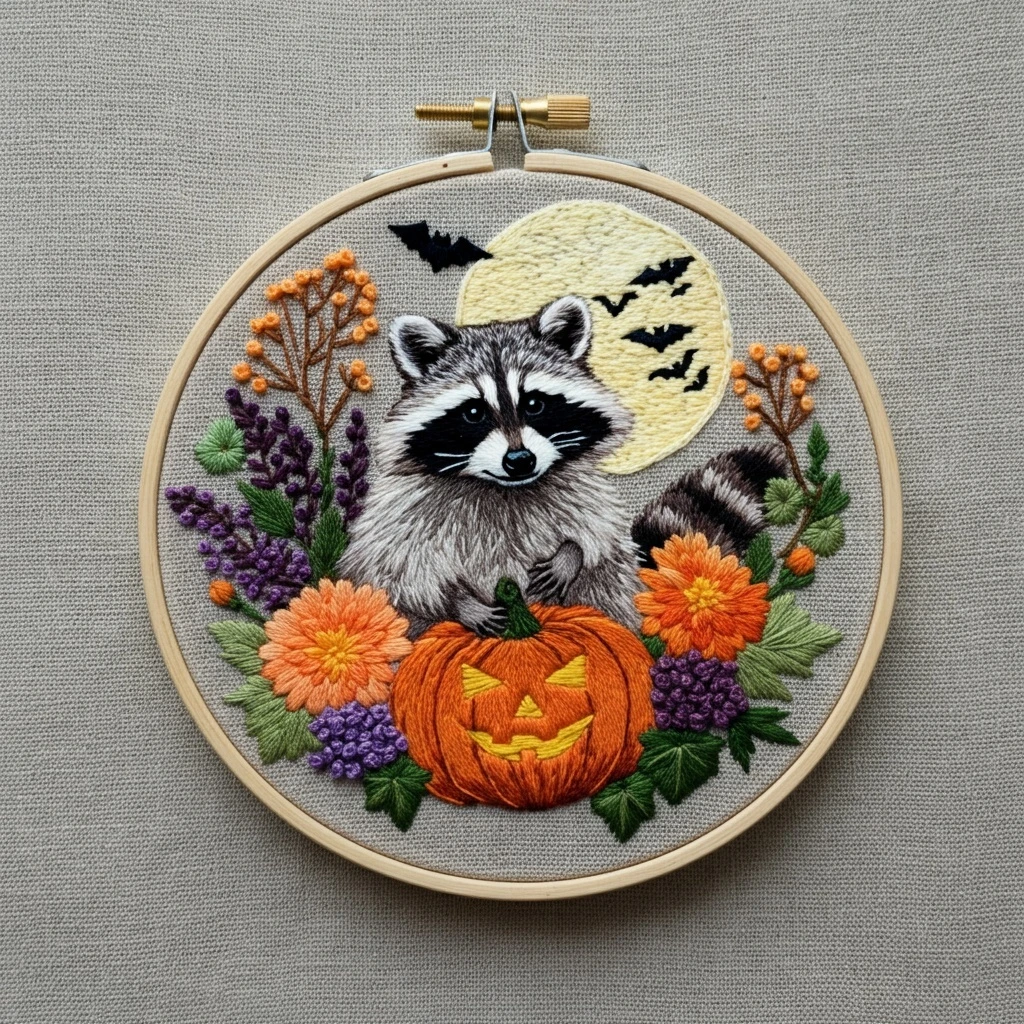
Raccoon Jack O Lantern Halloween
A charming Halloween embroidery scene with a mischievous raccoon, a glowing jack-o-lantern, cozy autumn tones, and playful spooky-season details. The design works best with soft fur direction, expressive dark mask markings, rounded pumpkin shading, and tiny warm highlights that make the lantern feel lit from within.
Design color read
The palette combines raccoon greys and warm brown fur notes with classic Halloween orange, golden lantern highlights, muted green leaves, and darker charcoal mask details. The raccoon’s face needs contrast without looking harsh: use charcoal for the mask, soft greys for the body, and beige-brown touches for warm fur transitions. The jack-o-lantern should be the brightest element.
Suggested DMC floss palette
These colors balance a cute woodland animal with cozy Halloween warmth. Keep DMC 310 only for tiny facial details and the darkest mask sections; most fur should be built with charcoal, pewter, beige, and soft grey.
Eyes, nose, tiny mouth marks, and the deepest points of the raccoon mask.
Main dark mask, ringed tail bands, paw shadows, and selective outlines.
Mid-dark fur on ears, cheeks, shoulders, and tail shading.
Main raccoon body fur, soft face areas, and light tail bands.
Warm muzzle, inner ears, chest fluff, and gentle fur highlights.
Warm outlines, pumpkin stem, branch accents, and soft shadow under the raccoon.
Pumpkin grooves, lower pumpkin shadows, and saturated jack-o-lantern orange.
Main pumpkin fill and rounded rib body color.
Raised pumpkin rib highlights and soft lantern glow around carved shapes.
Bright jack-o-lantern cutouts, tiny sparkle stitches, and warm glow accents.
Autumn leaves, vines, and muted greenery around the pumpkin.
Optional Halloween shadow accents, night details, and cool contrast behind the warm pumpkin.
Stitch map by design element
Raccoon face
Use long-and-short stitch for soft fur and one-strand backstitch for the eyes, nose, mouth, and mask edges.
Mask and tail rings
Use satin stitch or split stitch rows in charcoal and pewter, following the curve of the face and tail.
Muzzle and chest fluff
Use short directional stitches in beige and light grey. Feather the edges so the lighter fur blends naturally.
Jack-o-lantern
Fill pumpkin ribs separately with long-and-short or satin stitch, then add bright yellow inside the carved face.
Leaves and stem
Use fishbone stitch for leaves, stem stitch for vines, and small straight stitches for the pumpkin stem texture.
Halloween accents
Use French knots or tiny straight stitches for stars, specks, or decorative dots around the scene.
Thread-count and blending guidance
| Area | Strands | Blending idea | Practical note |
|---|---|---|---|
| Raccoon fur | 1 strand for face detail; 2 strands for body and tail fill | Use 3799 in the darkest mask, 413 and 414 for fur, and 842 for muzzle/chest highlights. | Follow fur direction outward from the nose and around the cheeks for a rounded, soft face. |
| Tail rings | 2 strands for smooth bands, 1 strand for edge refinement | Alternate 3799 and 414, adding 413 where the bands need a soft transition. | Curve the stitches around the tail shape; straight bands can look flat. |
| Pumpkin lantern | 2 strands for pumpkin ribs, 1 strand for final glow highlights | Use 720 in grooves, 741 through the middle, 742 on raised ribs, and 744 in carved openings. | Stitch the carved face after the orange fill so the yellow glow stays crisp and bright. |
| Outlines and details | 1 strand | Use 839 for warm outlines on pumpkin/stems and 3799 for raccoon facial details. | Avoid outlining the entire raccoon heavily; soft broken lines preserve the fur texture. |
Recommended stitching order
- Transfer the raccoon outline, mask markings, tail rings, pumpkin ribs, carved face, leaves, and small accent marks.
- Stitch background leaves, vines, and any decorative night details that sit behind the main figures.
- Fill the pumpkin rib by rib, then add the carved jack-o-lantern glow and stem texture.
- Stitch the raccoon body and tail, working dark ring markings before lighter fur highlights.
- Finish with eyes, nose, whisker dots, tiny highlights, and selective outlines.
Beginner-friendly practical tips
- Use short stitches around the raccoon face so the mask curves stay clean.
- Thread one strand for the eyes and nose; bulky facial details can change the expression.
- Do not fill all fur in black. Charcoal and grey values make the animal more readable.
- Keep pumpkin highlights small and curved to maintain the rounded rib shape.
- Press from the back on a towel so any knots or raised accents remain dimensional.
Texture, shading, and finishing notes
The most polished version combines soft animal texture with a clean, glowing pumpkin. Let the raccoon feel fuzzy and slightly irregular, while the jack-o-lantern stays bright, smooth, and clearly segmented.
Fur texture
Use broken long-and-short stitches instead of solid blocks. Around the cheeks and chest, blend light beige into grey with irregular stitch lengths. On the mask, keep charcoal edges cleaner so the raccoon expression remains recognizable.
Pumpkin dimension
Shade each pumpkin rib like a small curved wedge: dark orange in the groove, medium orange in the body, and light tangerine at the raised center. A few pale yellow stitches near the carved face create a warm Halloween glow.