
Realistic Golden Retriever Puppy
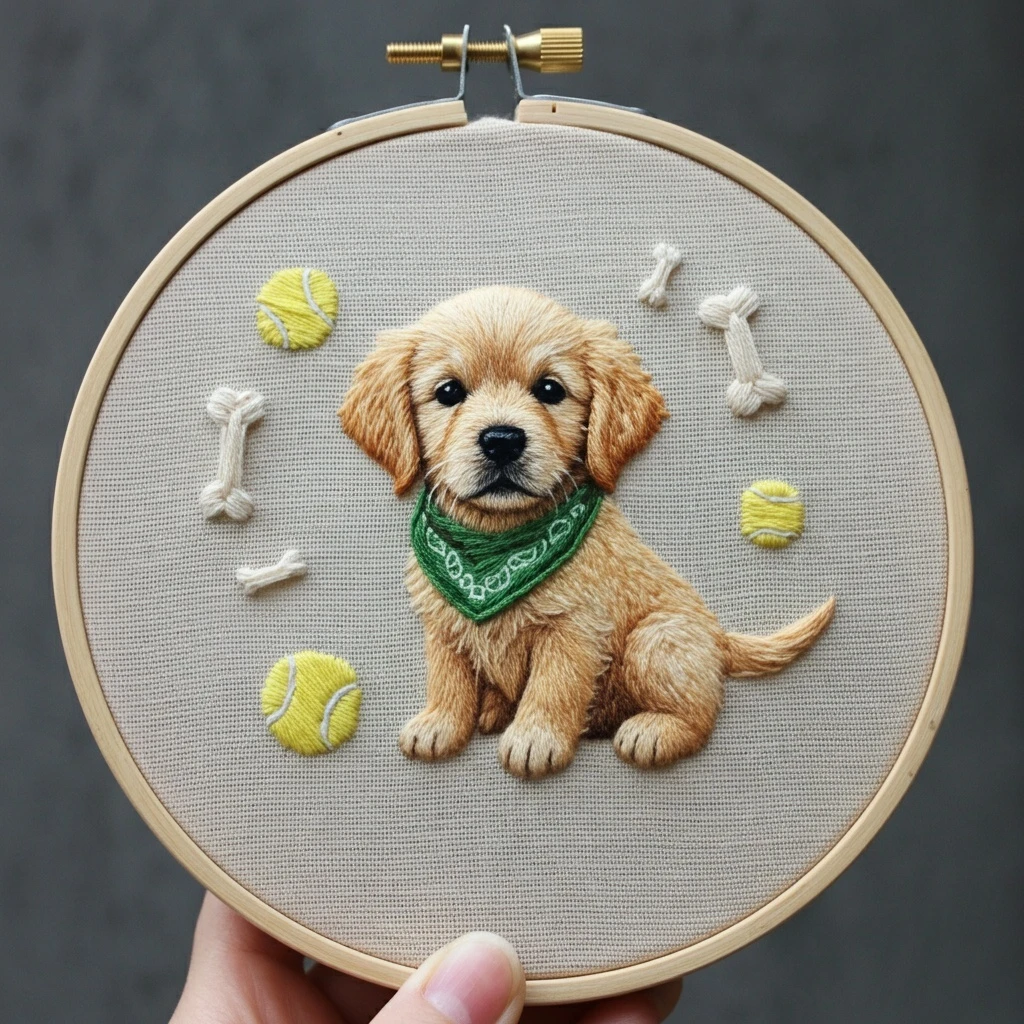
A soft, dimensional embroidery plan for a golden puppy portrait with fluffy fur, glossy dark eyes, a deep green bandana, tennis balls, raised bones, and natural linen background.
Design Read
The reference design centers a seated golden retriever puppy in a hoop. The most important visual effects are warm layered fur, rounded baby-puppy proportions, black wet-looking facial details, a textured green bandana, bright yellow tennis balls, and padded cream dog bones on neutral linen.
Core DMC Palette
Use these as practical approximations for the visible color families. Keep the fur palette close in value so the puppy reads soft rather than striped.
Fur Stitching
- Use long-and-short stitch with the needle direction following the puppy’s fur growth: outward from the forehead, down the cheeks, and along the body curve.
- Work with 1 strand for facial fur and 2 strands for body fill if the hoop is larger than 6 inches.
- Place DMC 712 sparingly on top of DMC 676 so the muzzle and brow feel fluffy, not flat.
Face & Expression
- Stitch the eyes last with satin stitch in DMC 310, then add a pin-dot of DMC 3865 or 712 for the wet sparkle.
- Use tiny split stitch or stem stitch for the mouth crease; avoid heavy black outlines around the whole muzzle.
- Add short dark-brown strokes under the ears and chin to make the head sit forward.
Bandana & Toys
- Fill the bandana with satin or split stitch in DMC 699, then layer DMC 702 and 3865 for paisley-style curls.
- Use padded satin stitch for tennis balls and dog bones to echo the raised 3D look.
- Keep toy outlines light so they support the puppy without competing with the portrait.
Recommended Stitch Plan
Transfer and map the fur
Draw only the main silhouette, eye placement, nose, bandana edge, paws, toy positions, and a few fur-direction arrows. Too many transfer lines can muddy the golden shading.
Build the soft base
Lay the puppy’s lightest areas first with 1 strand of DMC 676 and 712. Keep stitches irregular in length so the coat looks naturally fuzzy.
Add midtones and shadow
Blend DMC 3828 and 977 through ears, sides, chest, and haunch. Use DMC 433 only in narrow recesses: ear folds, paw gaps, chin shadow, and tail underside.
Finish focal details
Stitch the eyes, nose, and mouth with 1 strand. Use satin stitch for shine and a few straight stitches for whisker roots, but keep the expression gentle.
Add raised playful accents
Work bones and tennis balls after the puppy. For bones, pad with a few foundation stitches before satin stitch. For balls, use curved seam lines in white over yellow fill.
Thread Count & Blending
| Area | Strands | Best approach |
|---|---|---|
| Eyes, nose, mouth | 1 | Small satin stitches, split stitch outlines, single white highlight dot. |
| Face fur | 1 | Long-and-short stitch with frequent color changes for realistic softness. |
| Body and tail | 1–2 | Use 2 strands for coverage on larger hoops; return with 1-strand detail strokes. |
| Bandana | 2 | Satin or split fill, then 1-strand white/green scrolls on top. |
| Bones and tennis balls | 2–3 | Padded satin stitch or dense satin for a raised toy-like texture. |
Shading Notes
- Forehead: Use a fan of pale vertical strokes, blending DMC 712 into 676, then a few 3828 strands around the center part.
- Ears: Keep the outer ear warm and darker with 977 and 433; use lighter stitches at the top edge where the fur catches light.
- Chest: Alternate 676 and 3828 in downward strokes; leave tiny gaps of linen only if the fabric color harmonizes with the fur.
- Paws: Separate toes with short 433 stitches, then soften with 676 over the top so lines do not look cartoonish.
- Tail: Stitch from base to tip with curved strokes; brighten the upper ridge and deepen the underside.
Outlining & Texture
Use minimal outlines. This design relies on color layering, not heavy borders. Where definition is needed, choose a darker version of the local color instead of black.
- Outline the puppy silhouette with broken 1-strand split stitches in DMC 3828 or 977.
- Use DMC 433 for only the darkest recesses, especially between the front legs and under the ears.
- For fluff, add tiny fly stitches and random straight stitches over completed fill.
- For bones, couch or pad underneath before satin stitching to create the chunky raised ends.
- For tennis balls, stitch curved white seam lines over yellow satin fill, then add a few lemon highlights.
Beginner-Friendly Tips
- Start with the bandana and toys if realistic fur feels intimidating; they warm up your satin stitch control.
- Keep all fur stitches short around the face. Long facial stitches can make the puppy look older and less soft.
- Do not pull padded satin stitches too tight; raised bones and balls need relaxed tension.
- Step back often. Realistic fur usually looks better from viewing distance than it does close up while stitching.
- Use a sharp embroidery needle for 1-strand fur details and a slightly larger needle for padded toy sections.
Optional Expanded Palette
Add these colors only if you want extra realism or if your fabric/lighting makes the main palette too warm.