
DMC palette & hand embroidery guide
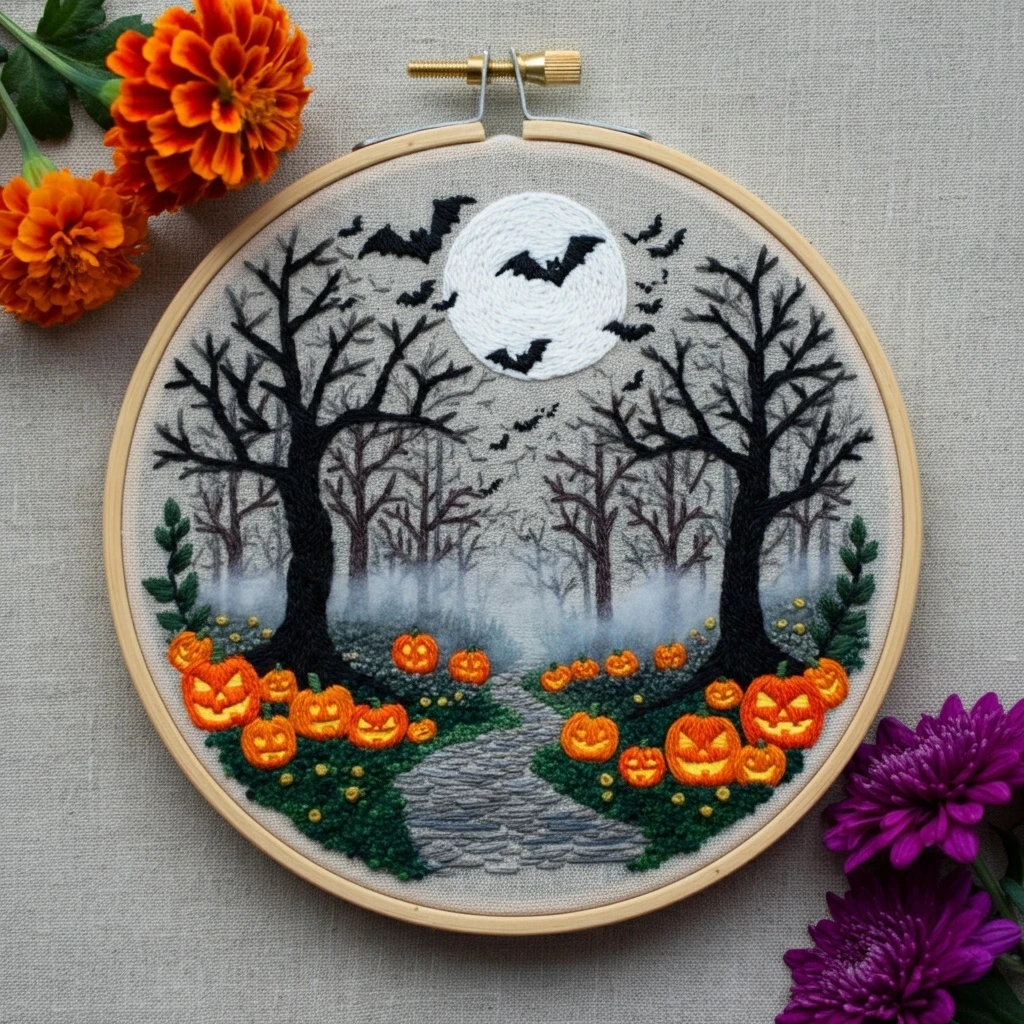
Spooky Forest Path Halloween
A moonlit woodland scene with black tree silhouettes, soft gray mist, glowing jack-o’-lanterns, mossy ground, winding stone path, and a flock of bats crossing a full moon.
Color read from the design
The artwork relies on strong Halloween contrast: deep black tree silhouettes and bats, a cool white moon, smoky gray distance, dark evergreen ground, warm orange pumpkins, and small golden details that make the jack-o’-lantern faces feel lit from within. Keep the background muted so the pumpkins and moon stay as the two brightest focal points.
Stitch map by design area
| Area | Suggested stitches | Thread guidance | Practical notes |
|---|---|---|---|
| Full moon | Split stitch spiral, stem stitch rings, or long-and-short fill | 2 strands B5200 + 3865; 1 strand 762 for slight shadow | Work from the center outward in curved rows. Keep the edge round but slightly textured, not perfectly flat. |
| Bats | Satin stitch for larger bats; tiny straight stitches for distant bats | 1–2 strands 310 | Use 1 strand for the small flock so they recede. Larger bats can be outlined first, then filled. |
| Large trees | Split stitch, stem stitch, padded satin for trunk mass, couching for thick limbs | 3–4 strands 310 for trunks; 1–2 strands 310/3371 for branches | Start with the trunk silhouette, then add branch hierarchy: thick limbs first, twig tips last. |
| Distant forest | Back stitch, whipped back stitch, sketchy straight stitch | 1 strand 938, 3371, 414 | Make background trees thinner, broken, and lighter. Avoid heavy black behind the fog. |
| Fog bank | Horizontal long straight stitch, seed stitch, very loose satin stitch | 1 strand 762/318; optional 1 strand 3865 | Float stitches lightly across trunks and ground. Leave tiny fabric gaps so it looks translucent. |
| Stone path | Stem stitch rows, split stitch curves, irregular straight stitches | 1–2 strands 762, 318, 414 | Follow the S-curve toward the horizon. Use darker gray on the side edges and short broken lines for stones. |
| Mossy ground | Seed stitch, French knots, turkey work trimmed low, detached chain leaves | 3–6 strands 895/986; highlights in 987 | Cluster texture heavily near the front and reduce stitch size toward the back for depth. |
| Pumpkins | Long-and-short stitch, satin stitch, stem stitch grooves | 2–3 strands 741/740/970; 1 strand 921 for seams | Stitch each pumpkin in curved vertical sections. Keep highlights on the moon-facing upper edges. |
| Glowing faces | Tiny satin stitch or single straight stitches | 1–2 strands 3852; edge with 921 or 310 | Place yellow first, then sharpen the expression with a hairline dark outline. |
| Side greenery | Fishbone leaves, lazy daisy, fern stitch | 2 strands 986/987; 1 strand 895 shadows | Angle leaves upward to frame the scene without competing with the trees. |
Thread-count & layering guide
Use thread thickness to create distance. The closest pumpkins and tree trunks can carry more strands and denser stitches, while the far forest should be drawn with single-strand sketch lines.
- 1 strand: distant trees, fine twigs, small bats, fog, path cracks, tiny facial outlines.
- 2 strands: moon rings, medium branches, pumpkin grooves, path rows, leaf details.
- 3 strands: pumpkin fills, front greenery, bold branch bases.
- 4–6 strands: padded black trunks and thick moss texture only where you want strong relief.
Recommended stitching order
- Transfer the path, moon, large trunks, and main pumpkin shapes first.
- Stitch the moon and background tree line before the foreground silhouettes.
- Add fog as a translucent layer crossing the lower forest.
- Build the path from back to front, increasing stitch size toward the viewer.
- Fill the main tree trunks and branches in black.
- Work greenery and pumpkins, then finish with faces, bats, and final outlines.
Blending ideas for a polished finish
Outlining details
Outline pumpkins in 921 first, then touch only the deepest cuts with 310. For trees, use 310 as the final outline after any brown under-stitching. For bats, keep edges crisp and angular so they read clearly against the moon.
Shading guidance
Imagine moonlight coming from the upper center. Place lighter grays on the top of the path, brighter orange on upper pumpkin ridges, and darker greens under pumpkins and tree bases.
Texture suggestions
Use short, uneven stitches for forest floor texture. Combine French knots, seed stitch, and tiny detached chains so the lower foreground feels rich without becoming bulky.
Beginner-friendly practical tips
- Do not overfill the fog. A few pale horizontal stitches are more convincing than a dense gray band.
- Keep branch tips fine. Switch to 1 strand for the last fork of each branch; thick twig ends can make the trees look heavy.
- Use short satin stitches on pumpkins. Long satin stitches can snag, especially on rounded shapes. Break each pumpkin into curved sections.
- Test black coverage first. On loose linen, 3 strands may cover well; on tighter cotton, 2 strands plus careful split stitch may look cleaner.
- Protect the moon. Stitch dark bats after the white moon is complete, and keep a clean needle for whites so black fibers do not dull the glow.
- Balance the orange. Scatter tiny pumpkins and golden knots across both sides of the path so one side does not feel visually heavier.