
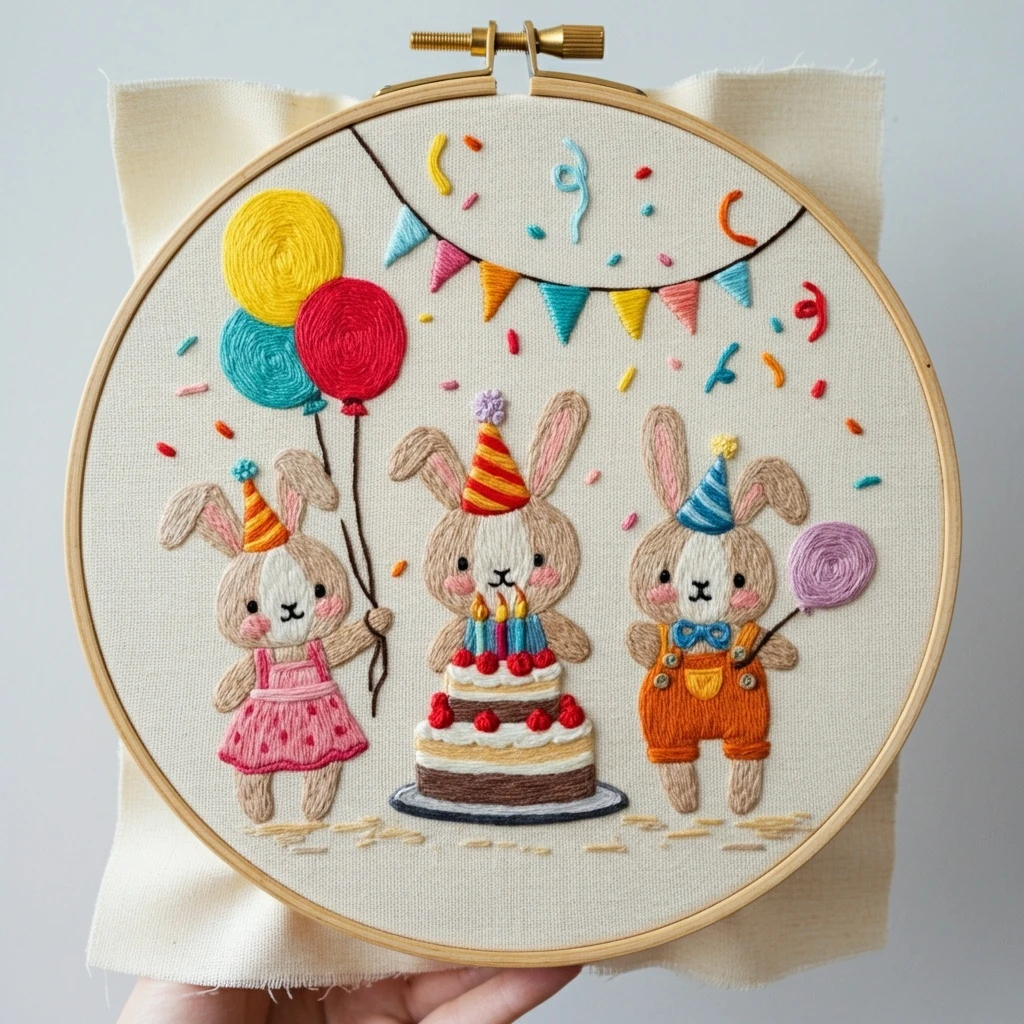
Birthday Bunny Celebration
A sweet party-themed hoop with a soft bunny focal point, cheerful birthday details, playful accents, and gentle pastel florals. The palette keeps the rabbit creamy and delicate while using brighter pinks, yellows, blues, and greens for the celebratory elements so the design feels joyful but still beginner friendly.
Suggested DMC Color Palette
These DMC choices are selected for a soft birthday-bunny composition: warm neutrals for fur, blush tones for ears and cheeks, and clear happy colors for party decorations, flowers, and tiny celebratory details.
Stitch Plan by Design Area
Bunny body
Outline with split stitch in 842 or a single strand of 3864, then use long-and-short stitch in 3865 with small touches of 842 along the lower edge, ear bases, and paws.
Face & expression
Use 3371 with 1 strand for eyes, mouth, and whisker dots. Keep facial stitches tiny; oversized dark stitches can make the bunny look heavy.
Inner ears & cheeks
Use satin stitch or short long-and-short rows in 818. Add a few 3712 stitches nearest the ear fold or cheek center for soft blush.
Party hat or bunting
Use back stitch for the edges, then satin stitch small color blocks in 742, 744, 3712, and 3752. Keep outlines slim so the decorations stay playful.
Cake, candle & confetti
Use tiny satin stitches for cake bands, straight stitches for candles, and single-wrap French knots for confetti. Place yellow knots last so they remain bright.
Florals & greenery
Work lazy daisy petals in 818 and 3712, French-knot centers in 744, and stem stitch greenery in 734 with darker 3052 at leaf bases.
Thread Count, Blending & Texture
- Facial details: 1 strand only for eyes, mouth, whisker marks, and tiny outlines.
- Bunny fur: 2 strands for long-and-short stitch; switch to 1 strand for delicate fur flicks around the cheeks and tail.
- Party accents: 2 strands for satin stitch on bunting, hats, balloons, cake bands, and small gifts.
- French knots: 1-2 strands. Use 1 strand for confetti and 2 strands for flower centers.
- Blend 3865 + 842 for subtle cream fur shadows that do not look gray.
- Blend 818 + 3712 for cheeks, inner ears, and richer pink petals.
- Blend 3752 + 3810 for a two-tone blue balloon or bunting segment.
- Blend 734 + 3052 for shaded leaves without adding extra stitch complexity.
Shading & Outlining Details
| Area | How to shade it | Best outline |
|---|---|---|
| Bunny face and body | Keep most of the fill in 3865. Place 842 under the chin, around paw joins, inside the ear base, and along the lower body. | Split stitch in 842 for a soft outline; use 3864 only where stronger separation is needed. |
| Ears and cheeks | Lay 818 first, then add a few 3712 stitches closest to the fold or cheek center. Avoid filling the whole area dark pink. | One strand of 842 or no outline if the shape is already clear. |
| Party decorations | Use stronger colors in small blocks. Repeat each bright shade at least twice around the design for balance. | Back stitch in the matching color or 3371 only for the tiniest graphic details. |
| Flowers and leaves | Alternate pink petal colors and place darker green near stem intersections. Yellow centers should be added after petals. | Stems in 734 stem stitch; leaf veins optional in 3052. |
Beginner-Friendly Practical Tips
Start with the bunny
Stitch the main outline and facial placement first. A clear face sets the mood, and it helps you judge how bold the surrounding party colors should be.
Protect pale areas
Do not carry dark floss behind the white bunny or light decorations. Short jumps can shadow through pale fabric and make the finish look less clean.
Use small satin areas
For bunting, hats, balloons, or cake stripes, keep satin stitches short and parallel. Long satin stitches snag easily and can warp small shapes.
Balance bright colors
Repeat pink, yellow, orange, and blue accents around the hoop rather than grouping all bright colors on one side.
Keep knots consistent
For confetti, use single-wrap French knots with one strand. For flower centers, use two strands or two wraps for a rounder dot.
Final crisping
Add the darkest details last: eyes, mouth, whisker dots, candle wick, and any tiny outlines. This keeps the design fresh and precise.
Recommended Stitch Order
- Transfer the design lightly and hoop the fabric evenly so the surface is firm but not stretched.
- Outline the bunny body, ears, paws, and key facial placement.
- Fill the bunny in soft cream tones, then add ear and cheek blush.
- Stitch party decorations such as hat, bunting, cake, candle, or balloons.
- Add flowers, leaves, confetti dots, and small celebratory details.
- Finish with one-strand dark accents, check for balance, and remove any visible guide marks.